Charging a Jump Starter With a Battery Charger
batterychargers.site and its partners may earn a commission if you purchase a product through one of our links
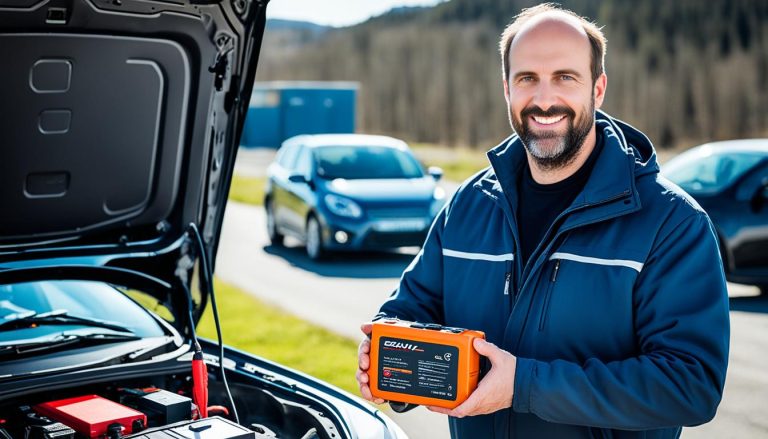
When you’re faced with a dead car battery, having a portable jump starter can be a lifesaver—especially when another vehicle isn’t available to provide a boost. Understanding how to charge a jump starter with a battery charger is crucial for drivers who want to be prepared for such roadside emergencies. Most jump starters can be easily topped up using a common household outlet, ensuring your device is always ready to get your vehicle back on the move.
Your jump starter’s internal battery is your key to quick revivals of your car’s engine. By charging a jump starter with a battery charger, you’re investing in your own peace of mind. It’s substantial to maintain and monitor your jump starter’s battery life, as using a well-charged unit could mean the difference between being stranded or driving off in minutes. Follow the right steps and you’ll rest assured that your jump starter is charged and ready to come to the rescue when you need it most.
Key Takeaways
- Charge your jump starter fully before its first use and maintain its charge regularly.
- Always connect red clamps to positive terminals and black to negative ones.
- Periodically check the charge level to ensure your jump starter is ready when needed.
- Comprehend the specific charging instructions for your make and model—safety first!
- Test the jump starter periodically to familiarize yourself with its operation.
The Essentials of Portable Jump Starters
When you’re on the road, one of the last predicaments you want to face is a dead car battery. That’s where a portable jump starter comes into play—not only does it give you peace of mind, but its ability to swiftly bring your vehicle’s battery back to life is nothing short of remarkable. But before you can fully rely on this compact lifesaver, it’s crucial to understand the array of features and jump starter capabilities available in the market.
Understanding Your Jump Starter’s Capabilities
While the primary function remains the same—to deliver enough current to kick-start your dormant battery—the nuances between different jump starters can play a pivotal role in emergencies. High-quality jump starters often come equipped with added features such as a built-in battery charger for jump starter replenishment, emergency lights, and even the convenience of USB ports to charge your personal devices.
Variations in Power and Features
Each portable jump starter comes with its own set of specifications tailored to various needs. You might find ones that are geared toward heavy-duty vehicles, requiring more power, while others are more suited for your average sedan or motorcycle. A comparison table below sheds light on some typical variations you can expect:
| Feature | Basic Units | Advanced Units |
|---|---|---|
| Battery Type | Lead-Acid | Lithium-Ion |
| Power Output | Up to 12 Volts | 6, 12, and 24 Volts |
| Additional Features | Limited or None | USB Ports, LED Lights, Power Inverters |
| Size and Weight | Heavier and Bulkier | Compact and Lightweight |
Remember, selecting the right portable jump starter boils down to knowing the battery capacity of your vehicle and considering which additional features will enhance your roadside readiness. With the right knowledge and equipment, you can make an empowered decision that ensures you’re never stranded with a dead battery again.
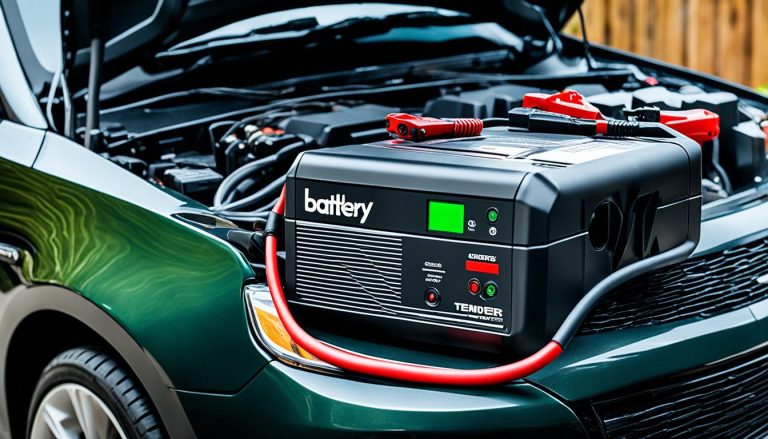
Can I Charge a Jump Starter With a Battery Charger?
Have you ever wondered, “can I charge a jump starter with a battery charger?” The answer is a definitive yes. A jump starter can be refreshed and ready for the next unexpected battery drop by using a suitable battery charger. This process not only primes the jump starter for action but also mitigates the strain on your vehicle’s alternator, so it doesn’t have to work overtime to charge a spent battery following a jump start.
When setting out to charge a jump starter with a battery charger, it’s essential to ensure the two devices are compatible. What does this mean? The output provided by the battery charger must align with the jump starter’s specified charging requirements. Using a charger that exceeds or falls short of these specifications can result in inefficient jump starter charging or even damage the unit. With the correct pairing, the charging process is seamless, reliable, and extends the life of your jump starter.
- Inspect your jump starter and battery charger manual for compatibility.
- Match the charger’s output voltage and amperage with your jump starter’s specifications.
- Connect the charger to your jump starter using the appropriate port.
- Monitor the jump starter during charging to prevent overcharging.
Moreover, understanding your jump starter’s charging needs can be greatly aided by referring to an informative comparison chart:
| Jump Starter Model | Required Voltage | Recommended Charger Output | Charging Time |
|---|---|---|---|
| XtremePowerUS 12000 | 12V | 1A | 3-4 Hours |
| Noco Genius Boost Pro | 12V | 2.1A | 6 Hours |
| DBPOWER 600A | 12V | 2.1A (Max) | 5 Hours |
Remember, the best practice is to follow the exact steps provided in your user manual to guarantee a secure charging process. Proper jump starter charging ensures your device is not only ready to leap into action at a moment’s notice but also enjoys a long and reliable lifespan. So, the next time your car needs a quick energy boost, reach for your fully charged jump starter with confidence.
Preparing Your Jump Starter for Charging
Before you can harness the power of your portable jump starter in a roadside emergency, making sure it’s adequately charged is critical. A well-charged jump starter stands as your reliable ally against unexpected battery failures. Starting off with the proper charging steps not only ensures your device’s efficiency but also extends its operational lifespan.
Initial Charging Steps
The journey towards a fully charged portable jump starter begins with understanding the initial charging steps. This stage is crucial for setting up your device. Firstly, identify whether your jump starter is new or has been in storage. Brand new jump starters might require a longer initial charge for optimal performance, while those retrieved from storage may need a top-up to restore them to full charge capacity.

You should commence by plugging in the jump starter to a compatible charger. Most models come equipped with their own charging cables, but if not, ensure that you’re using the right connector that fits snugly into the charging port. For initial charging, it’s advisable to charge the unit uninterrupted until it reaches full capacity, a process that could take several hours. Patience during this phase lays the foundation for the reliable operation of your jump starter.
Checking Charge Levels and Connections
Before you consider the charging process complete, checking the charge levels is essential. Most jump starters have an LED display or indicator lights that clearly show the current power level. It’s imperative that you familiarize yourself with these indications to understand when your jump starter is fully charged or when it might need a power boost.
Secure connections are the bedrock of effective charging. Make certain that the power cable is firmly connected to the charger and the jump starter. Any loose connections could result in slow or incomplete charging, which could be detrimental when the time comes to use the device. It’s always best practice to ensure that everything is connected properly before leaving the jump starter to charge.
By attentively following these initial charging steps and regularly checking jump starter charge levels, you ready your emergency kit for the moment you need it the most. Adequate preparation today can prevent the headaches of powerless jump starters and stranded situations on the road tomorrow.
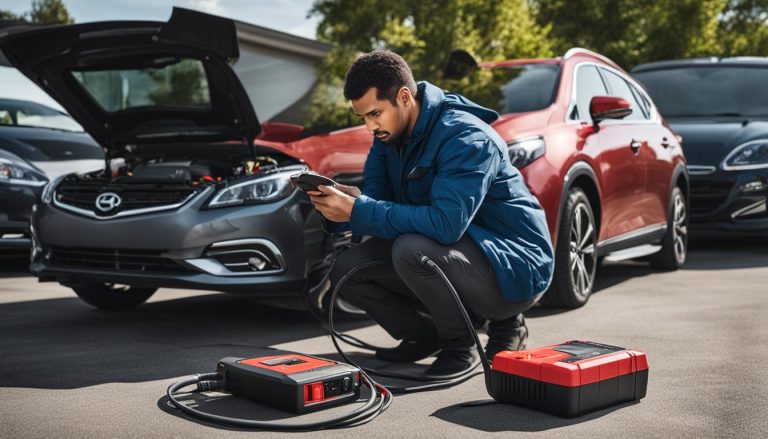
Step-by-Step Guide to Charging Your Jump Starter
Being prepared is key when dealing with a dead car battery. Having a jump starter charged and ready can take the stress out of those unexpected situations. Follow these straightforward steps to ensure you know how to charge jump starter with a battery charger effectively and uphold safe jump starter charging practices.

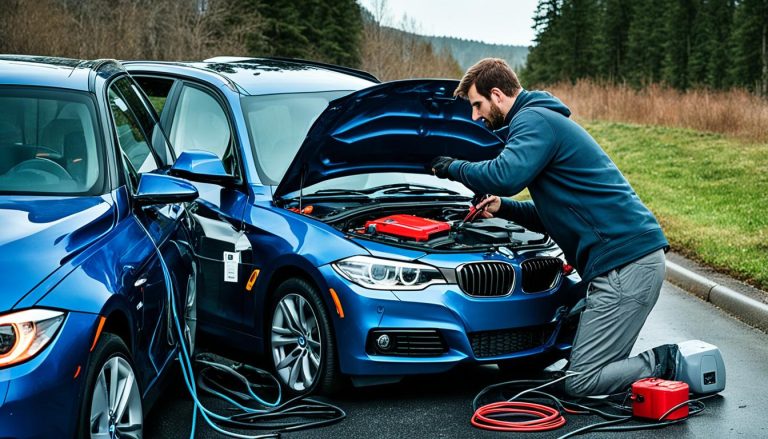
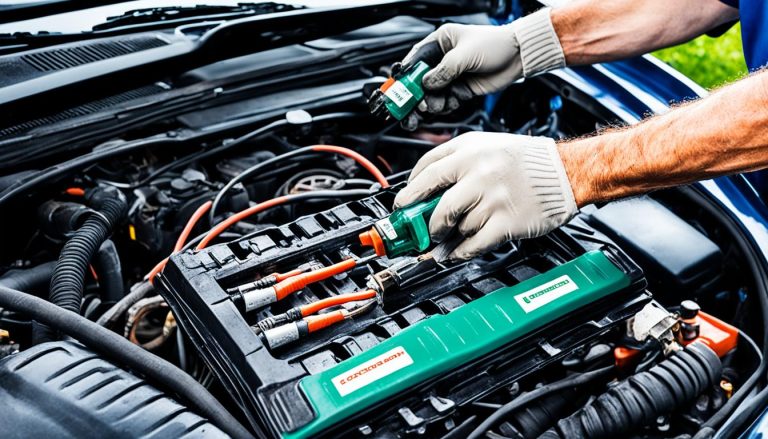
Attaching Clamps to the Battery Correctly
Before you start the engine, it’s vital to connect the jump starter clamps correctly. Ensure the red clamp is attached to the battery’s positive post and the black clamp is secured to the negative post. Adhering to this protocol is an essential part of the process, as improper attaching clamps to battery can cause damage to both your vehicle and the jump starter.
Ensuring Safe Charging Practices
To keep you and your vehicle safe, always wear protective clothing and glasses when charging your jump starter. Remember, never turn on the jump starter before it’s correctly connected to the battery. Observe strict adherence to the polarity of connections and avoid over-cranking the engine. Post successful start-up, disconnect the jump starter cautiously while keeping the engine running. Following these precautions is non-negotiable for safe jump starter charging practices.
- Red clamp to positive post
- Black clamp to negative post
- Never turn on jump starter before attachment
- Do not crank engine for more than 5 seconds
- Disconnect carefully after the engine starts
- Wear protective gear throughout the process
Regularly charging your jump starter as per instructions and taking care of how you attach and detach it will not only safeguard your equipment but also ensure that it is always ready for when you need it the most.
Maximizing the Performance of Your Jump Starter
Understanding how to keep your jump starter at peak jump starter performance levels is crucial to ensuring that it’s ready when you need it the most. Frequent use of the battery charger for jump starter units is advised—recharging after each use not only maintains the battery’s power but also its lifespan. The golden rule is to maintain a regular charging regimen: for optimal performance, your jump starter should never be left depleted for too long.

Temperature plays a significant role in your jump starter’s health. Extreme heat or cold can negatively impact battery efficiency, so when you’re charging your device, aim for a moderate, stable environment. Also, remember that the built-in features—like the handy USB outlets or air compressors—can draw power away from the main function of your jump starter: getting your car running. Regularly tops up the power to cater to these additional drains.
- Maintain a steady charging schedule
- Avoid exposure to extreme temperatures during charging
- Replenish charge after using any built-in power-draining features
Here’s a simple table to help you remember the basics of maintaining your jump starter’s top condition:
| Activity | Frequency | Impact on Performance |
|---|---|---|
| Recharging after use | After each use | Keeps battery ready & prolongs lifespan |
| Regular maintenance charge | Every six months | Ensures optimal performance & reliability |
| Usage in moderate temperatures | During each charge | Protects battery efficiency |
By following these guidelines, your jump starter performance will be reliable and consistent, and you’ll be ready to tackle any unexpected battery troubles with confidence.
Maintaining Your Jump Starter for Longevity
Understanding the essentials of maintaining your jump starter not only ensures readiness in unexpected breakdowns but also significantly improves jump starter longevity. Proper care and storage can greatly extend the life of your device, providing security that it will function when most needed.

Regular Charging Schedules
Adhering to a regular charging schedule for your jump starter is crucial. It is recommended to charge your device immediately after use to ensure maximum efficiency for the next unexpected dead battery. To maintain optimal jump starter battery life, establish a routine to charge the device at least once every six months if not in regular use.
Storage Tips to Preserve Battery Life
Where and how you store your jump starter can have a significant impact on its longevity. Ensure to keep your jump starter in an environment where it is protected from elements that could degrade its battery life. The ideal storage condition is a cool, dry place, away from temperature extremes.
| Action | Benefit | Frequency |
|---|---|---|
| Charge after use | Ensures readiness | After each use |
| Maintain charge | Preserves battery capacity | Every 6 months |
| Store in proper conditions | Extends overall battery life | Consistently |
| Check for corrosion | Avoids connection issues | Periodically |
Choosing the Right Battery Charger for Your Jump Starter
It’s critical to select a charger that harmonizes with your device for an efficient power boost. Scouring the market for the perfect battery charger can be overwhelming, but pinpointing the one tailored to your jump starter’s needs will not only save you time but also extend the life of your equipment. Let’s delve into the benchmarks for compatibility and what constitutes an excellent charger.
Compatibility Between Jump Starters and Chargers
When it comes to powering up your jump starter, ensuring alignment between the charger and your device is non-negotiable. Voltage output from the battery charger should mirror the jump starter’s input requirements—this coherence is non-negotiable. An imbalance in voltage can be detrimental, leading to underperformance or, worse, damage to the inner workings of your jump starter. Always cross-reference the manufacturer’s specifications of both gadgets to guarantee an optimal match.
Features to Consider in a Quality Battery Charger
Focusing on battery charger features is crucial for maintaining the vitality of your jump starter. Look for indicators that reveal charge levels at a glance, built-in overcharge protection, and adaptability with different charging rates to address diverse energy needs. Never underestimate the significance of practical elements: simple interfaces and integrated safety mechanisms underscore a battery charger’s quality. By prioritizing these key features, you’ll be taking an informed step towards enhancing the functionality and lifespan of your jump starter.
FAQ
How do I charge a jump starter with a battery charger?
To charge a jump starter with a battery charger, first ensure that your charger is compatible with the jump starter’s battery type and voltage. Connect the charger to the jump starter according to the manufacturer’s instructions. Plug the charger into a power source and allow the jump starter to charge until it reaches full capacity, as indicated by the jump starter’s charge status display or light indicator.
What capabilities should I understand about my portable jump starter?
It’s important to know the type of battery within your jump starter (usually lead-acid or lithium-ion), the voltage output, and how many jump starts it can provide on a full charge. You should also be familiar with additional features it may have, such as USB charging ports, LED lights, or air compressors.
Can any battery charger be used to charge a jump starter?
Not all chargers are suitable for every jump starter. Before using a battery charger, check that the voltage and charge rate are compatible with your jump starter to avoid damage. Always follow manufacturer recommendations for both the jump starter and the charger.
What are the initial steps for charging my jump starter?
Begin by checking the charge level of your jump starter to determine how much charging is needed. Make sure the charging port on the jump starter is clean and free from debris. Connect the charger’s output plug or cable to the jump starter’s port, ensuring a secure fit.
How do I check charge levels and connections before charging?
Check the charge level through the jump starter’s built-in indicator, which could be a series of LEDs or a digital display. Verify that all cables and connections are secure and that the charging pin or port is properly attached to the jump starter.
What is the correct way to attach clamps from a jump starter to a car battery?
Attach the red clamp to the positive (+) post of the car battery and the black clamp to the negative (-) post or an unpainted metal surface on the car’s frame. Ensure the clamps have a firm grip and the cables are not tangled or near any moving parts.
How can I ensure safe charging practices for my jump starter?
Always charge the jump starter in a well-ventilated area, away from flammable items. Follow the jump starter’s charging instructions carefully, and do not leave the charger unattended for extended periods. Once charging is complete, disconnect the charger before attempting to start the vehicle.
What can I do to maximize the performance of my jump starter?
To get the best performance, regularly recharge your jump starter after each use, and maintain it by charging every six months during periods of non-use. Store it in a cool, dry place away from extreme temperatures to preserve the health of the battery.
How often should I charge my jump starter to ensure it lasts longer?
Charge your jump starter immediately after each use. Even if it hasn’t been used, it’s good practice to recharge it every six months to keep the battery in good condition and ensure it’s ready for emergency situations.
What storage tips can help preserve the life of my jump starter’s battery?
Store your jump starter in a cool, dry place, out of direct sunlight and away from extreme heat or cold. Keep the charging port and clamps clean, and regularly inspect the unit for any signs of wear or damage. Proper storage will extend the battery’s life and maintain its charge capacity.
How do I choose the right battery charger for my jump starter?
Look for a battery charger that matches the voltage and capacity requirements of your jump starter. Consider features like charge rate settings, charge status indicators, automatic shut-off to prevent overcharging, and compatibility with different types of batteries. Read reviews and check the manufacturer’s guidelines for recommendations.
What makes a battery charger compatible with my jump starter?
Compatibility depends on the battery charger providing the correct voltage and amperage as required by your jump starter. Additionally, the charger should have the appropriate connectors to fit your jump starter’s charging port.
What features should I consider in a quality battery charger for my jump starter?
Look for safety features such as overcharge protection, spark-proof connectors, and polarity protection. A quality charger will also have multiple charging modes to accommodate different battery sizes and conditions. Indicators for charge level and a durable design are also important considerations.