Troubleshooting a Golf Cart Battery Charger Not Working
batterychargers.site and its partners may earn a commission if you purchase a product through one of our links
If you own an electric golf cart, it’s important to ensure that your battery charger is working correctly. A malfunctioning charger can prevent you from fully enjoying your golf cart experience. In this article, we will guide you through the process of troubleshooting a golf cart battery charger not working and help you fix any issues that may arise.
When your charger fails to turn on, it can be frustrating. However, there are several potential causes for this problem, and we are here to help you identify and resolve them. Whether it’s a low battery charge, incorrect connections, or other common issues, we will provide you with the guidance you need to get your charger up and running again.
In addition to troubleshooting the charger itself, we will also discuss possible golf cart-related issues that may affect the charging process. From a confused onboard computer to blown fuses or damaged relays, we will cover all the bases to ensure a comprehensive troubleshooting process.
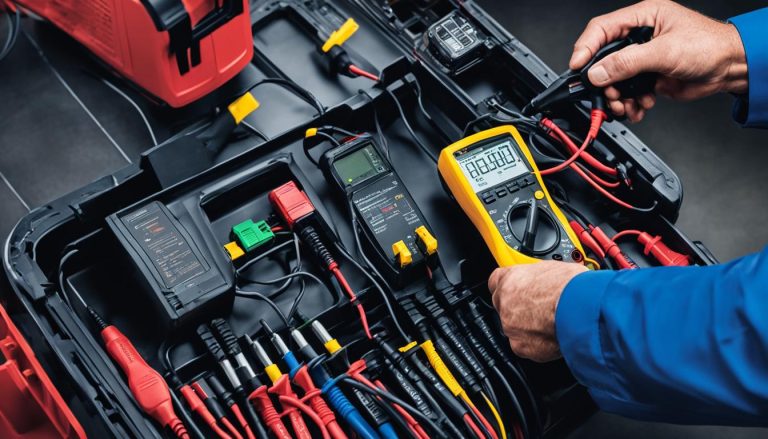
Testing your batteries is another crucial step in diagnosing charger problems. We will show you how to use a voltmeter or a multimeter to check the voltage of each battery and determine whether they are the source of the issue. We will also discuss the importance of manually charging the batteries if needed.
Furthermore, we will guide you through the process of checking the connections between the charger and the batteries. Corroded or weak connections can hinder the charging process, and we will provide you with tips on how to properly inspect and clean the connections to ensure optimal performance.
If all else fails and you’ve ruled out other potential causes, we will explain how to troubleshoot the charger itself. By inspecting the circuit boards and replacing damaged components, you may be able to resolve the issue without having to invest in a new charger.
To summarize, this article will equip you with the knowledge and steps necessary for troubleshooting and fixing a golf cart battery charger that is not working. We will cover all potential causes and provide you with actionable solutions to get your charger and golf cart back in top shape.
Key Takeaways:
- Ensure your batteries are sufficiently charged and correctly connected before troubleshooting your golf cart battery charger.
- If your charger won’t turn on, check the battery charge and connections to identify potential issues.
- Chargers running either too long or not long enough may indicate a problem with the charger’s computer or components, requiring professional assistance or replacement.
- Don’t forget to test your batteries using a voltmeter and consider manual charging if needed.
- Inspect and clean the connections between the charger and the batteries to ensure optimal performance.
Charger Won’t Turn On
If you’re experiencing the frustration of your golf cart charger not turning on, there are a few potential culprits to investigate. One common reason for this issue is a low battery charge. When the battery charge is too low, the charger may not detect it and fail to start.
Before troubleshooting further, it’s crucial to ensure that your batteries have a minimal charge of 25-30 volts. If the batteries are completely drained, the charger may not recognize them. Consider jump-starting the batteries using a car battery charger or manually charging them before attempting to use the golf cart charger.
In addition to checking the battery charge, inspecting the connections between the batteries and the charger is essential. Ensure the connections are secure and properly hooked up. Corrosion on the battery terminals can obstruct the flow of electricity and prevent the charger from starting. If you notice any corrosion, use a baking soda paste to clean the terminals and apply an anti-corrosive spray for future protection.
Charger Runs Too Long or Not Long Enough
One common issue that golf cart owners face is their charger running either too long or not long enough. This can be frustrating, as it can lead to incomplete charging or excessive charging, both of which can negatively impact the performance and lifespan of the batteries. Let’s explore the potential causes and solutions for this problem.
Possible Causes
The most likely culprit for a charger running too long or not long enough is a malfunctioning computer system within the charger. The computer is responsible for regulating the charging process and determining when to stop. If it fails to accurately detect the battery’s charge level, it can result in extended charging times or premature disconnection.
Another possible cause is a faulty component within the charger itself. Over time, components can wear out or become damaged, affecting the charger’s ability to function properly.
Solutions
If you’re experiencing this issue with your golf cart charger, here are a few steps you can take to address the problem:
- Check the charger’s computer: Start by inspecting the charger’s computer system. Look for any obvious signs of damage or loose connections. If you’re comfortable doing so, you can also try resetting the computer by disconnecting the charger from the power source for a few minutes and then reconnecting it.
- Replace the faulty component: If the computer appears to be functioning correctly, but the issue persists, it may be necessary to replace a faulty component within the charger. Consult the charger’s user manual or contact the manufacturer for guidance on identifying and replacing the specific component.
- Consider purchasing a new charger: If the above solutions don’t resolve the problem, it might be a sign that your charger has reached the end of its lifespan. In this case, investing in a new charger could be the most practical solution to ensure reliable and efficient charging for your golf cart.
If you’re unsure about the cause of the issue or uncomfortable handling these troubleshooting steps yourself, it’s recommended to seek professional assistance. A certified technician can diagnose the problem accurately and provide appropriate solutions.
| Potential Causes | Solutions |
|---|---|
| A malfunctioning computer system within the charger | Check the charger’s computer and reset it if necessary. Replace the computer if it’s faulty. |
| Faulty component within the charger | Identify and replace the malfunctioning component. |
| End-of-life for the charger | Consider purchasing a new charger. |
Golf Cart Issues
Sometimes, the golf cart itself can interfere with the charging process. In the case of a 48-volt Club Car, the onboard computer may be confused about the charge in the batteries. The relay should make a clicking sound when the charger is plugged in, indicating proper functioning. If there is no click, it could be due to a blown fuse or a damaged relay. It’s important to check the fuse and relay, if applicable, and consider replacements if necessary.
Common Golf Cart Charging Issues
When troubleshooting a golf cart that is not charging, it’s essential to consider potential issues with the cart itself. Here are a few common problems:
- Golf Cart Computer Confusion: The onboard computer of a 48-volt Club Car can sometimes misinterpret the charge level in the batteries, leading to charging problems. If the computer is confused, it may prevent the charger from functioning properly.
- Blown Fuse: A blown fuse can interrupt the charging process and prevent the charger from working. Checking the fuse and replacing it, if necessary, can help resolve the issue.
- Damage to the Relay: The relay in a golf cart is responsible for controlling the flow of electricity during the charging process. If the relay is damaged, it may not properly engage when the charger is plugged in, resulting in charging issues.
These golf cart issues can significantly impact the charging process and prevent the batteries from receiving the necessary charge. It’s important to address and resolve these problems to ensure optimal performance and battery life.
“When the golf cart computer is confused or there is a blown fuse or damaged relay, the charging process can be adversely affected, resulting in incomplete or unsuccessful charging. Identifying and fixing these issues are crucial for proper golf cart functionality.”
To understand the impact of these issues on the charging process, refer to the table below:
| Golf Cart Issue | Impact on Charging |
|---|---|
| Golf Cart Computer Confusion | Prevents charger from functioning correctly, may lead to incomplete or inadequate charging |
| Blown Fuse | Interrupts charging process, charger fails to provide the required charge to the batteries |
| Damage to the Relay | Relay fails to engage properly, resulting in charging issues and inadequate battery charge |
Resolving Golf Cart Charging Issues
To address these golf cart issues and ensure proper charging, follow these steps:
- Check the onboard computer of the golf cart and reset it if necessary. This can help resolve any confusion and allow the charger to function correctly.
- Inspect the fuse and replace it if blown. Ensure the replacement fuse has the correct amperage rating for the golf cart.
- Examine the relay for any signs of damage, such as burned-out components or loose connections. If the relay is damaged, consider replacing it with a new one for optimal charging performance.
Testing Your Batteries
To determine whether the problem lies with the batteries or the charger, it’s important to test the batteries. Using a voltmeter or a multimeter, check the voltage of each battery to ensure they have a sufficient charge. A reading of at least 25-30 volts indicates that the batteries are not the issue.
If you don’t have a voltmeter or a multimeter, you can manually charge the batteries using a car battery charger. This can help revive completely dead batteries and provide better testing results. After manual charging, retest the batteries using the voltmeter or multimeter.

| Battery | Voltage Reading |
|---|---|
| Battery 1 | 28.5 volts |
| Battery 2 | 29.2 volts |
| Battery 3 | 27.8 volts |
| Battery 4 | 30 volts |
By testing your batteries using a voltmeter or manually charging them, you can accurately determine if the batteries are the cause of the charging issue.
Checking Charger Connections
When troubleshooting a faulty golf cart battery charger, one of the most important steps is to check the connections between the charger and the batteries. The charger’s ability to function properly depends on tight, secure connections that are free from corrosion and fraying.
Weak or corroded connections can impede the flow of electricity, resulting in charging issues. If you notice any dirt or corrosion on the battery terminals, it’s crucial to clean them thoroughly to restore optimal connection. A simple baking soda paste can be used to scrub the terminals, followed by the application of an anti-corrosive spray.
By ensuring the charger connections are in good condition, you can significantly improve the charger’s performance and enhance its ability to charge the golf cart batteries effectively.

Common Charging Issues due to Charger Connections:
- Corroded Connections: Corrosion on the battery terminals can hinder the flow of electricity, causing the charger to function improperly. Regularly inspect and clean the connections to prevent corrosion buildup.
- Weak Connections: Loose or weak connections can result in intermittent charging or a complete failure to charge the batteries. Ensure all connections are tight and secure to maintain a stable electrical flow.
If you identify any issues with the charger connections, it’s important to address them promptly to avoid further complications. Taking the time to inspect and maintain charger connections can save you from potential charging problems and extend the lifespan of your golf cart battery charger.
Troubleshooting the Charger Itself
If all other potential causes have been ruled out, it’s time to focus on troubleshooting the charger itself. By following these steps, you can identify and address issues that may be preventing your golf cart battery charger from working correctly.
Removing the Charger Cover
The first step in troubleshooting the charger is to remove the charger cover. This will provide you with access to the internal components of the charger, allowing for a closer inspection.
To remove the charger cover:
- Make sure the charger is disconnected from the power source.
- Locate the screws or clips that hold the cover in place.
- Using the appropriate tools, carefully remove the screws or release the clips.
- Gently lift the cover off the charger, taking care not to damage any internal components.
Inspecting the Circuit Boards
Once the charger cover is removed, it’s important to inspect the circuit boards for any visible signs of damage. This includes looking for water damage, corrosion, or melting of components.
To inspect the circuit boards:
- Visually examine each circuit board, paying close attention to any areas that appear discolored or corroded.
- Check for loose connections or damaged traces on the circuit boards.
- Note any components that appear burnt or melted.
Replacing Damaged Components
If you identify any damaged circuit boards, diodes, or fuses during your inspection, it’s crucial to replace them. These damaged components can lead to charging issues and prevent the charger from functioning properly.
Please note that replacing circuit boards and other internal components requires technical knowledge and expertise. If you’re not comfortable with these tasks, it’s recommended to consult the charger manufacturer or seek professional assistance.
“By inspecting the charger’s internal components and replacing any damaged parts, you can effectively troubleshoot and resolve issues that may be affecting the charger’s performance.”
Remember, troubleshooting the charger itself should only be undertaken after other potential causes have been ruled out. If you’re unsure about any aspect of the troubleshooting process, it’s always best to seek professional help to avoid causing further damage.
Frequently Asked Questions about Golf Cart Chargers
If you have questions or concerns about golf cart battery chargers, you’re not alone. In this section, we provide answers to common FAQs to help you understand and make the most of your golf cart charger.
1. How do I choose the right replacement charger for my golf cart?
When buying a replacement charger, it’s important to consider the voltage and compatibility with your golf cart. Check the specifications of your cart’s battery pack and ensure that the replacement charger matches the required voltage. Additionally, consider factors such as charging time, durability, and warranty to make an informed decision.
2. How long does it take to charge a golf cart battery?
The charging time for a golf cart battery can vary depending on various factors, such as the charger’s amperage, the state of charge of the batteries, and the depth of discharge. On average, it can take anywhere from 3 to 8 hours to fully charge a golf cart battery. It’s important to follow the manufacturer’s recommendations and avoid overcharging the batteries.
3. What is the storage mode feature on a golf cart charger?
The storage mode feature on a golf cart charger is designed to optimize battery longevity during periods of inactivity. It automatically adjusts the charging process to maintain the batteries at an optimal level without overcharging them. This feature is particularly useful during the off-season or when the golf cart will not be used for an extended period of time.
4. Is my charger compatible with different golf cart brands?
While some chargers are designed to be universally compatible with different golf cart brands, it’s important to check the specifications and compatibility requirements of both the charger and your golf cart. Certain brands may have specific charging protocols or connector types, so it’s best to ensure compatibility before using a charger with a different brand of golf cart.
By addressing these frequently asked questions, we hope to provide you with a better understanding of golf cart chargers and help you make the right choices for your needs. If you have any further questions or concerns, feel free to consult the manufacturer or seek professional assistance for personalized guidance.
FAQ
My golf cart battery charger won’t turn on. What could be the problem?
There are a few possible causes for a golf cart battery charger not turning on. One common issue is low battery charge, where the charge is too low for the charger to detect. Make sure your batteries have some charge, typically a base charge of 25-30 volts. Additionally, check the connections between the batteries and ensure they are hooked up correctly. Corrosion on the battery terminals can impede the flow of electricity and cause the charger to fail.
My golf cart charger runs either too long or not long enough. What could be the issue?
If your golf cart charger runs either too long or not long enough, it could indicate a problem with the charger’s computer. The computer may not know when to stop charging. In this case, replacing the faulty component or purchasing a new charger may be necessary. If your charger is making a clicking sound, it could be a sign of failure. It’s recommended to have a professional examine the charger and check the warranty for potential replacements.
My golf cart is not charging. What could be causing this?
If your golf cart is not charging, it’s possible that the onboard computer is confused about the charge in the batteries. This is common in 48-volt Club Cars. Check if the relay is making a clicking sound when the charger is plugged in, as this indicates proper functioning. If there is no click, it could be due to a blown fuse or a damaged relay. Make sure to check the fuse and relay, if applicable, and consider replacements if necessary.
How can I test my golf cart batteries to determine if they are the issue?
To test your golf cart batteries, you can use a voltmeter or a multimeter to check the voltage of each battery. A reading of at least 25-30 volts indicates that the batteries are not the issue. If your batteries are completely dead, you can also manually charge them using a car battery charger and then retest the golf cart charger.
What should I check when troubleshooting a golf cart battery charger?
When troubleshooting a golf cart battery charger, it’s important to check the connections between the charger and the batteries. Ensure that the connections are tight, free from corrosion, and not frayed. Weak or corroded connections can impede the proper functioning of the charger and lead to charging issues. If any connections are dirty or corroded, scrubbing the battery terminals with a baking soda paste and applying an anti-corrosive spray can help.
How can I troubleshoot the charger itself?
To troubleshoot the charger itself, start by removing the charger cover and inspecting the circuit boards for any visible damage, such as water damage, corrosion, or melting. If you notice any damaged components, such as circuit boards, diodes, or fuses, replacing them may resolve the charger-related issues. If you’re unsure how to proceed, consult the charger manufacturer or seek professional assistance for advanced troubleshooting.
What are some frequently asked questions about golf cart chargers?
Commonly asked questions about golf cart chargers include how to choose a replacement charger, understanding charging times, using the storage mode feature, and compatibility of chargers with different golf carts. These FAQs can provide helpful information for customers looking to troubleshoot or improve their golf cart charging experience.