Troubleshooting: Golf Cart Battery Won’t Take Charge
batterychargers.site and its partners may earn a commission if you purchase a product through one of our links
If you own an electric golf cart and are experiencing issues with your battery not taking a charge, it can be frustrating and worrisome. However, there are several troubleshooting steps you can take to identify and resolve the problem.
Common causes for a golf cart battery not charging properly include low battery charge, faulty connections, problems with the battery charger, or issues with the golf cart itself. By following these troubleshooting tips, you can get your golf cart back on track and ensure that your battery is charging effectively.
Key Takeaways:
- Check the charge level of your batteries and ensure the connections are secure.
- Test the batteries and the charger to determine if they are working properly.
- Inspect the golf cart for any issues that may be affecting the charging process.
- Ensure there is power to the electrical outlet where the charger is plugged in.
- If you are unsure or uncomfortable with troubleshooting, seek assistance from a professional or specialized golf cart battery supplier.
Check Battery Charge and Connections
Before diving into more complex troubleshooting, it’s important to check the charge level of your batteries and the connections. Ensuring that your golf cart battery is properly charged and has good connections is essential for optimal performance. Here are some steps you can take to address the issue when your golf cart battery is not holding a charge or not charging properly:
1. Check Battery Charge
Start by checking the charge level of your golf cart battery. The battery should have a base charge of 25-30 volts for the charger to detect it. If the charge is too low, you may need to use a small manual charger to provide each battery with enough power to activate your regular charger.
2. Inspect Battery Connections
Inspect the battery terminals for any signs of corrosion or rust. Corrosion can inhibit the flow of electricity and prevent your battery from charging properly. If you notice any corrosion, use a wire brush or battery terminal cleaner to remove it. Additionally, ensure that the battery connections are secure and not frayed. Weak or faulty connections can result in a loss of power and prevent the charger from functioning effectively.
By checking the charge level of your batteries and inspecting the connections, you can address common issues that can lead to a golf cart battery not holding a charge or not charging properly. Taking these steps will help ensure that your battery is receiving the necessary power and that the charger is functioning optimally.
3. Maintain Battery Health
To prevent future charging issues and maximize the lifespan of your golf cart battery, it’s essential to maintain its health. Regularly check the water level in each battery cell and top it up with distilled water if needed, ensuring the water level covers the plates. Avoid overcharging the battery, as this can lead to damage. Additionally, it’s important to use the correct charger for your battery type and follow the manufacturer’s instructions for charging and maintenance.
By monitoring the charge level and connections of your golf cart battery, you can identify and address any issues that may be causing it to not hold a charge or charge properly. Taking proactive steps to maintain battery health will prolong its lifespan and ensure your golf cart operates smoothly.
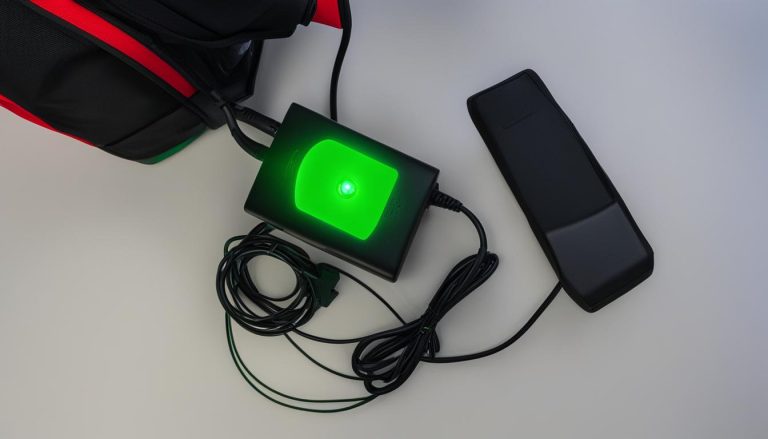
Test Battery and Charger Functionality
If your charger is not turning on or it is running for too long or not long enough, there may be issues with the battery or the charger itself. Test the batteries using a voltage tester to determine if they are still working and in need of a charge or replacement. If the batteries are low on power, new batteries may be necessary. Additionally, if the charger’s computer is malfunctioning, it may not know when to stop charging or not turn on at all. In such cases, consider replacing the faulty component or purchasing a new charger.

| Issue | Possible Cause | Solution |
|---|---|---|
| The charger is not turning on | Faulty charger or power supply issues | Replace the charger or check the power supply |
| The charger is running for too long | Malfunctioning charger or battery issues | Replace the charger or check the battery |
| The charger is not running long enough | Defective charger or low battery power | Replace the charger or charge the batteries |
Testing the battery and charger functionality is an important step in troubleshooting golf cart battery charging problems. By identifying and addressing any issues with the battery or charger, you can ensure that your golf cart’s battery is charging properly and maintain its performance on the course.
Troubleshoot Golf Cart and Charger Interaction
If you’re experiencing issues with your golf cart battery not charging properly, the problem may be with the interaction between the golf cart and the charger. One common scenario occurs with 48-volt Club Cars, where the onboard computer can become confused about the battery charge levels, causing the charger to malfunction.
To diagnose this issue, start by plugging in the charger and listening for a clicking sound from the relay. If you don’t hear a clicking sound, it could indicate a blown fuse or a damaged relay that requires professional examination.
Another factor to consider is the condition of your charger’s cables. Both the AC and DC cables should be inspected for damage or wear, as this can impede proper charging. If any issues are found with the cables, they may need to be repaired or replaced.
To summarize, when troubleshooting golf cart battery charging problems, it’s important to check the interaction between the golf cart and charger. Look for clicking sounds from the relay, inspect the charger’s cables, and address any issues promptly to ensure your golf cart battery charges effectively.

| Issues | Possible Causes |
|---|---|
| No clicking sound from the relay | Blown fuse or damaged relay |
| Damaged charger cables | Impedes proper charging |
Additional Troubleshooting Tips
If you have followed the previous troubleshooting steps and are still experiencing issues with your golf cart battery not taking a charge, there are a few additional steps you can take.
Firstly, ensure that there is power to the electrical outlet where the charger is plugged in. Make sure the outlet is functioning properly and providing the necessary power for the charger to operate.
Next, carefully inspect the batteries for any signs of corrosion or loose cables. Corrosion can hinder the charging process and prevent the battery from accepting a charge. Clean any corrosion using a mixture of baking soda and water and tighten any loose connections.
If you want to take your troubleshooting a step further, you can use a multi-meter to check the battery pack voltage and the voltages of each individual battery. This can help you identify any weak or faulty batteries that may need to be replaced.
If you are unsure or uncomfortable with these troubleshooting steps, it is recommended to seek assistance from a seasoned professional or contact a specialized golf cart battery supplier for guidance. They will have the expertise to diagnose and fix any complex issues with your golf cart battery charging system.
FAQ
What are some common causes for a golf cart battery not charging properly?
Common causes include low battery charge, faulty connections, problems with the battery charger, or issues with the golf cart itself.
How can I check the charge level of my golf cart batteries?
Use a voltage tester to ensure that the batteries have a base charge of 25-30 volts for the charger to detect them.
What should I do if the batteries have a low charge?
Use a small manual charger to provide each battery with enough juice to activate your regular charger.
What should I do if there is corrosion on the battery terminals?
Clean the terminals and ensure that the connections are secure and not frayed.
What could be causing my charger to not turn on or run for too long/not long enough?
There may be issues with the battery or the charger itself. Test the batteries using a voltage tester to determine if they are still working and in need of a charge or replacement. Also, consider replacing the faulty component or purchasing a new charger.
Why is my 48-volt Club Car not charging properly?
The onboard computer can become confused about the battery charge levels, preventing the charger from functioning properly. Check for a clicking sound from the relay when you plug in the charger. If there is no sound, there may be a blown fuse or a damaged relay, which will need professional examination.
What should I check if my charger’s cables are damaged?
Check the condition of your charger’s cables, both AC and DC, as any damage or wear can impede proper charging.
What should I do if I’ve followed the troubleshooting steps and my golf cart battery still won’t take a charge?
Ensure there is power to the electrical outlet where the charger is plugged in. Check for any corrosion or loose cables on the batteries. It may also be helpful to use a multi-meter to check battery pack voltage and individual battery voltages to further diagnose the problem. If you are unsure or uncomfortable with these steps, seek assistance from a seasoned professional or contact a specialized golf cart battery supplier for guidance.