Jump Start Your 24 Volt Battery Safely – Quick Guide
batterychargers.site and its partners may earn a commission if you purchase a product through one of our links
Encountering a dead battery can derail your plans, especially if you operate a vehicle with a 24 volt system such as a truck or a bus. But don’t worry, with this 24 volt battery jump start guide, you’ll be back on the road in no time. Knowing how to safely jump start a 24 volt battery is key to avoiding any possible mishaps during the process. From making the right connections to taking the necessary safety precautions, we’ll guide you through each step to ensure you handle the situation like a pro.
Key Takeaways
- Always prioritize safety by wearing protective gear and cautiously making cable connections.
- Understand your vehicle’s 24 volt system configuration before attempting a jump start.
- Use a 12 volt vehicle carefully to jump start the 24 volt battery, if a 24 volt source isn’t available.
- Properly connect the jumper cables to avoid short circuits and potential damage.
- Look for a jump start pack or dedicated charger that is compatible with your battery system.
- After starting, let the vehicle’s alternator fully charge the battery to prevent future issues.
- Seek professional assistance if you are unsure about the process or if the problem persists.
Understanding the Basics of 24 Volt Battery Systems
When dealing with commercial vehicles, understanding the electrical system is crucial, especially when it comes to the 24v battery jump start procedure. Heavy-duty vehicles, such as trucks and buses, rely on a robust 24 volt system, which typically involves pairing two 12 volt batteries in series. This setup is essential for providing the power needed to start large engines and operate complex electronics.
The Common 24 Volt Configuration in Vehicles
In this dual battery configuration, each 12 volt battery contributes to achieving the total required 24 volts. It’s the backbone of the vehicle’s power system, ensuring that all electrical components function properly. When you turn the ignition key, the electrical charge from this 24 volt system is what brings the engine to life, powering the starter motor and getting you on the road.
When 24 Volt Systems Require a Jump Start
There are certain situations where your vehicle might need a helping hand to get going. If you’re facing starting troubles due to reasons like prolonged inactivity, extreme weather conditions, or electrical problems, jump starting a 24 volt system may be necessary. It’s a process that, although common, requires knowledge and caution to execute safely and effectively.
Preliminary Safety Measures Before Attempting a Jump Start
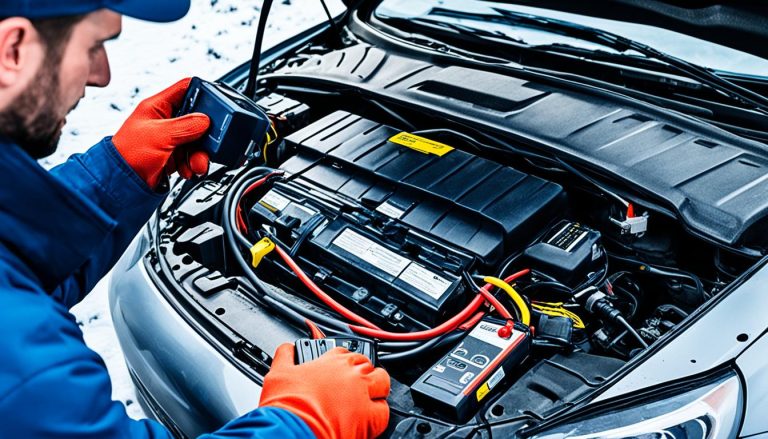
Your safety should always be the priority when attempting to jump start. Before you begin the process, it’s imperative that you wear proper protective gear, such as safety glasses and gloves. Ensure that the vehicle is in neutral and that the parking brakes are engaged to prevent any unwanted movement. Moreover, a thorough check of the batteries’ condition is vital prior to connecting jumper cables, as damaged batteries could lead to hazardous situations. When in doubt, seeking professional help is a wise decision to avoid the risk of accidents or causing further damage to your vehicle’s intricate electrical system.
Understanding these essential aspects of 24 volt battery systems prepares you for moments when you might need to jump start your vehicle. Armed with this knowledge, you can approach the jump starting procedure with confidence, ensuring safety and success in reviving your vehicle’s battery.
How to Jump Start a 24 Volt Battery
Jump starting a 24 Volt battery need not be intimidating; with the right knowledge, you can get a vehicle up and running swiftly. To guide you through the step-by-step jump start process for 24v batteries, this section outlines a reliable method that can help you understand how to jump start a 24 volt battery when you’re in a pinch. Safety and precision are vital, and we’ll cover both to ensure no missteps occur during the process.

Before you begin, ensure that both vehicles are turned off. It’s essential to use quality jumper cables that can facilitate the necessary power transfer without a hitch. Here’s what to do:
- Establish the connection between the positive terminal of the 12 Volt car’s battery and the positive terminal of one of the two batteries in the 24 Volt system.
- Secure the negative jumper cable to the negative terminal of the 12 Volt car’s battery and connect the other end to a grounded metal component on the engine block of the 24 Volt vehicle, away from the battery.
- Run the engine of the 12 Volt car at increased RPM, which helps build enough charge for the jump start.
- Attempt to start the engine of the 24 Volt vehicle. If it starts, let it run for a few minutes.
- After ensuring the 24 Volt engine is running smoothly, carefully remove the jumper cables, starting with the negative ones followed by the positive, to prevent any electrical surges.
It’s crucial that the process is followed accurately to avoid any damage to the vehicle’s electrical system. Double-check the connections before starting the vehicle and maintain a clean contact at the terminals for optimal electrical connectivity.
Remember, safety first – always wear protective gear, and never attempt a jump start if you are unsure about the correct procedure. When in doubt, consulting a professional is your safest bet.
By following these steps and taking the necessary precautions, you will have your 24 Volt system powered up and ready to go. Keep these instructions handy for future reference and never let a discharged battery disrupt your plans again.
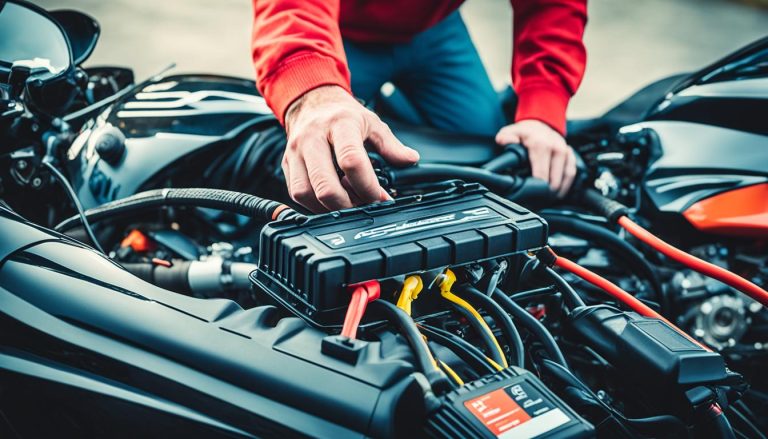
Essential Tools Needed for Jump Starting 24 Volt Batteries
When you’re facing the task of jump starting 24 volt batteries, having the right equipment is not just a convenience—it’s a necessity for ensuring the process is completed safely and effectively. Below, we’ll explore the tools that are essential for this endeavor and some additional items that can aid in the process, all aimed at guiding you on how to jump start a 24v battery without hassles.
Choosing the Appropriate Jumper Cables
Selecting the correct jumper cables is crucial for the success of jump starting 24 volt batteries. You need cables that can handle the high power demands of such systems, typically found in heavy-duty vehicles. Look for heavy-duty jumper cables that have a gauge rating between 0 and 4 and opt for a length of approximately 20 to 25 feet to allow for flexibility in vehicle positioning.
The clamps should be strong, with insulated handles to prevent any accidental shocks. A reliable set of cables can mean the difference between a quick fix and a call to the tow truck, so invest in a durable set to carry in your vehicle at all times.
Additional Safety and Convenience Tools
Aside from jumper cables, several other tools should be part of your battery jump starting kit:
- Safety Glasses and Gloves: Always protect your eyes and hands from potential sparks or battery acid.
- Flashlight: A clear flashlight will assist you in seeing what you’re doing, especially if you find yourself in need of a jump start in the dark.
- Distilled Water: For topping off batteries that are not maintenance-free.
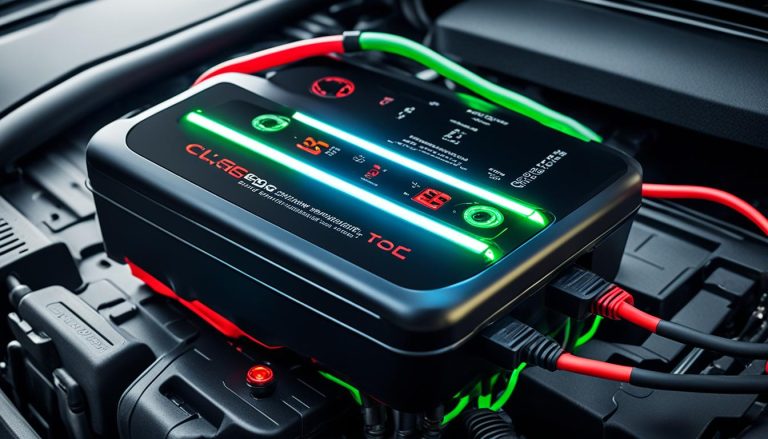
- Battery Charger or Booster: For those situations where a jump start isn’t enough, having a charger or booster at hand may be invaluable.
It’s important to familiarize yourself with these tools in advance. When the time comes, knowing how to jump start a 24v battery efficiently could save you both time and stress.

Step-by-Step Guide to Safely Jump Starting a 24 Volt System
If you’ve found yourself in a situation where you need to know how to jump start a 24 volt battery, following a proven step-by-step guide is crucial for a safe and successful power boost. Being prepared can turn a potentially stressful circumstance into a minor hiccup in your day. To facilitate a smooth process, we’ve prepared detailed instructions that will help you jump start your vehicle confidently.
Before beginning, make sure that the working vehicle’s engine is turned off and that both vehicles are in park or neutral with the parking brakes set.
Begin by positioning the donor vehicle close to the vehicle with the dead battery so that your jumper cables can easily span the distance. Turn off any electrical accessories in both vehicles to prevent potential power surges. Here’s a clear breakdown:
- Connect the positive (+) cable to the positive terminal of the dead battery.
- Attach the other end of the positive cable to the positive terminal of the donor battery.
- Secure the negative (-) cable to a solid, unpainted metal surface on the engine block or chassis that is away from the dead battery. This is critical to prevent sparks near the battery.
- Lastly, clamp the other end of the negative cable to the negative terminal of the boosting battery.

To transfer power adequately, start the engine of the assisting vehicle and allow it to run for several minutes which helps to charge the dead battery. After you’ve waited, attempt to start the disabled truck. If it successfully starts, let it idle to build up charge.
Once the jumped vehicle is running steadily, it’s time to carefully remove the jumper cables. Ensure that you follow the reverse order of connections:
- Remove the negative cable from the booster vehicle.
- Detach the negative cable from the metal surface on the previously disabled truck.
- Take off the positive cable from the booster vehicle’s battery.
- Finally, unhook the positive cable from the now-started truck’s battery.
| Step | Action | Result |
|---|---|---|
| 1 | Connect positive (+) cable to dead battery. | Prepare for energy transfer. |
| 2 | Connect negative (-) cable to ground on truck. | Establish a safe circuit away from the battery. |
| 3 | Start donor vehicle and let it run. | Charge the dead battery via the electrical current. |
| 4 | Attempt to start disabled truck after charging. | Energize truck’s starter and engine. |
| 5 | Remove cables in reverse order once started. | Disconnect safely avoiding electrocution risk. |
Remember, always prioritize safety over haste. Your safety and the safety of your vehicles are paramount. By following this 24 volt battery jump start guide, you’ll be well-equipped to handle jump-starting large battery systems with ease.
Tips for Proper Cable Connection and Initiating the Jump Start
Successfully jump-starting a 24-volt battery requires precision and an understanding of the proper procedure. To ensure the safety and efficacy of the process, follow these guidelines to jump start a 24v battery with confidence.
Positioning the Vehicles for Optimal Accessibility
Effectively jump starting 24 volt batteries begins with the right setup. Park the assisting vehicle close to the one being jump-started, ideally with the batteries parallel to each other. This proximity allows for unobstructed access and easier connectivity, reducing the tension on the jumper cables and improving the power transfer.

Correct Order of Cable Connections
Making the correct connections when attaching the jumper cables is crucial to prevent damage to both vehicles’ electrical systems. Here’s the sequential order you should follow:
- Attach one end of the positive cable to the positive terminal of the dead battery.
- Connect the other end of the positive cable to the positive terminal of the assisting vehicle’s battery.
- Connect one end of the negative cable to a grounded metal component on the 24V vehicle, away from the battery.
- Attach the other end of the negative cable to the negative terminal of the assisting vehicle’s battery.
Important: Ensure each connection is secure and free from corrosion before proceeding to start the engine.
Starting the Engine and Removing Cables Safely
With everything connected, start the engine of the assisting vehicle, letting it idle for a few minutes to charge the dead battery. Attempt to start the 24-volt vehicle. If unsuccessful, wait another few minutes before trying again. Once the vehicle starts:
- First remove the negative cable from the assisting vehicle.
- Next, remove the negative cable from the grounded metal component.
- Then, remove the positive cable from the assisting vehicle’s battery.
- Lastly, remove the positive cable from the initially dead battery.
Store your jumper cables properly to avoid contamination and ensure they’re ready for your next jump start a 24v battery event.
Common Challenges and Solutions in Jump Starting 24v Batteries
If you’ve ever found yourself facing the daunting task of jump starting a 24 volt system, you know that it can come with its fair share of challenges. One common issue that arises is improper configuration connections—an easy mistake to make when nerves are frayed, and you’re keen on getting your vehicle running. Double-checking the cable connections to ensure they match the positive and negative terminals correctly is not just a recommendation; it’s a necessity. Incorrect connections can cause short-circuiting, potentially leading to far graver issues than a simple dead battery.
Speaking of dead batteries, they can be quite stubborn, particularly in cold conditions when freezing temperatures significantly decrease batteries’ performance. When dealing with an uncooperative engine, make sure your vehicle’s battery is not frozen and inspect the jumper cables for any wear or damage. A solid ground connection is also crucial for a successful jump start. If you’ve attempted the step-by-step jump start process for 24v batteries and your engine still resists the revival, it might be time to consider that the problem could be more complex than the battery.
In such cases, seeking professional assistance is a wise move. It’s important to remember that persistent issues might indicate a more deep-rooted electrical problem within your vehicle. On a brighter note, you can mitigate many of these challenges with routine battery maintenance. Keep those terminals clean and battery charged; it’s a simple step that can save you the hassle and the unexpected adventure of jumping a stubborn 24v battery. By maintaining your vehicle’s battery, you may preserve not only your sanity but also the longevity of your truck’s electrical system.
FAQ
What is the common configuration for a 24 Volt battery system in vehicles?
The common configuration for a 24 Volt battery system in vehicles involves two 12 Volt batteries connected in series. This setup is typical in heavy-duty vehicles like trucks and buses.
When does a 24 Volt system typically require a jump start?
A 24 Volt system usually requires a jump start when the batteries lose charge, which can happen due to prolonged inactivity, temperature fluctuations, or underlying electrical issues in the vehicle.
What safety measures should I take before attempting to jump start a 24 Volt system?
Before attempting to jump start a 24 Volt system, take safety measures such as wearing protective gear (safety glasses and gloves), ensuring the vehicle is in neutral with brakes engaged, and checking the batteries’ condition for any signs of damage or corrosion.
How do you jump start a 24 Volt battery using a 12 Volt source?
To jump start a 24 Volt battery with a 12 Volt source, connect the positive cable to the positive terminal of one of the 24 Volt batteries and the negative cable to a ground on the 24 Volt vehicle. Start the 12 Volt vehicle and let it charge the 24 Volt battery for a few minutes before trying to start the 24 Volt vehicle.
What are the essential tools needed for jump starting 24 Volt batteries?
Essential tools for jump starting 24 Volt batteries include heavy-duty jumper cables with a suitable gauge, safety glasses and gloves, a clear flashlight, and potentially a battery charger or booster. Ensure that the jumper cables have sturdy, insulated handles for safety and durability.
What is the correct order of cable connection when jump starting a 24 Volt battery?
The correct order of cable connection is to first connect the positive cable to the positive terminal of the dead battery and then to the boosting battery. Then, connect the negative cable to grounded metal on the engine block or chassis followed by the negative terminal of the good battery.
How do you properly remove jumper cables after jump starting a vehicle?
Properly remove jumper cables by first disconnecting the negative cables on both vehicles, followed by the positive cables. Remove the cables in the reverse order of connection to prevent electrical surges or sparks.
What are common challenges while jump starting a 24 Volt system and how can I solve them?
Common challenges include improper cable connections, completely dead batteries, or cold temperatures affecting battery performance. If after following proper procedures the engine doesn’t start, check for damaged cables or ensure a solid ground connection. If issues persist, it may be time to seek professional assistance.