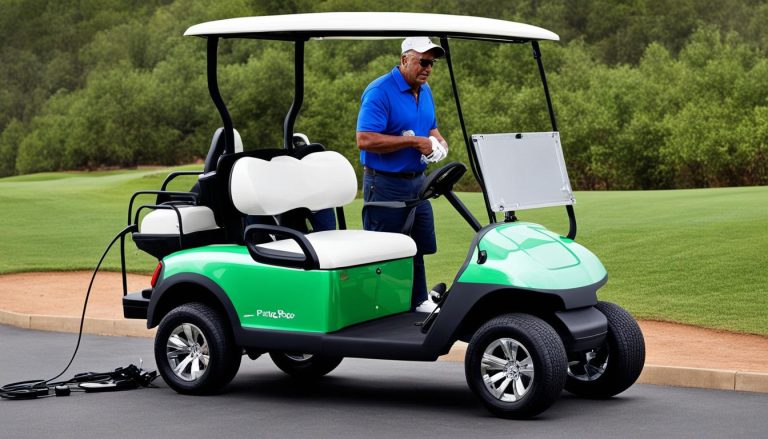
Testing Your Golf Cart Battery Charger Easily
batterychargers.site and its partners may earn a commission if you purchase a product through one of our links
To ensure that your golf cart is always ready for your rides, it is important to regularly test your golf cart battery charger. By testing the charger, you can determine if it is functioning properly or if it needs to be replaced. This will help you avoid any unexpected failures or issues when you are out on the course. Testing your golf cart battery charger is a simple process that can be done with a few basic tools and steps. In this article, we will guide you through the process of testing your golf cart battery charger to ensure optimal performance.
Key Takeaways:
- Regularly testing your golf cart battery charger is essential for maintaining optimal performance.
- Testing the charger helps identify any potential issues before they become major problems.
- Properly functioning charger ensures that your golf cart batteries are being charged correctly.
- Testing the charger allows you to troubleshoot any electrical problems that may affect your golf cart’s performance.
- Knowing how to test your golf cart battery charger can save you money on unnecessary repairs or replacements.
Why Should You Test Your Charger?
Testing your golf cart battery charger is crucial for maintaining optimal performance and avoiding potential issues. By conducting regular tests, you can identify any underlying problems with the charger and take necessary actions to prevent major disruptions during your golfing experience.
Testing the charger also ensures that your golf cart batteries receive appropriate charging. Inadequate voltage or current supply from the charger can result in insufficient charging, leading to reduced battery life and potentially leaving you stranded on the course.
Moreover, testing the charger allows you to troubleshoot any electrical problems that may be affecting your golf cart’s performance. By understanding the diagnostic measures and performing the necessary tests, you can address any issues and optimize the charging process for your batteries.
By recognizing the importance of testing your golf cart battery charger, you can ensure the longevity and reliability of your golf cart, providing you with the best golfing experience possible.
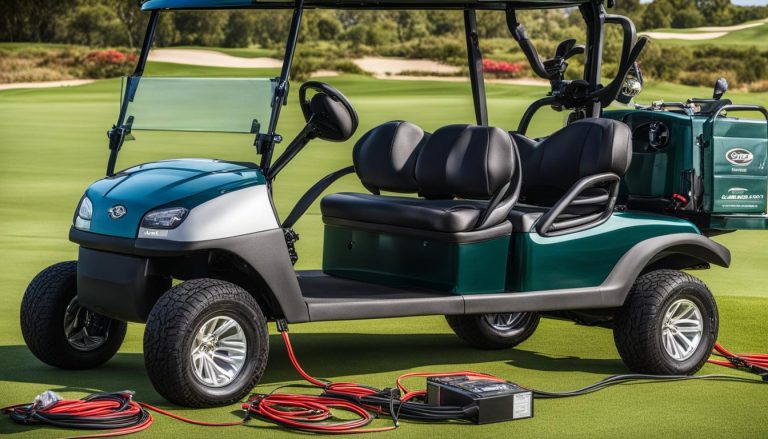
What You Need to Test a Charger
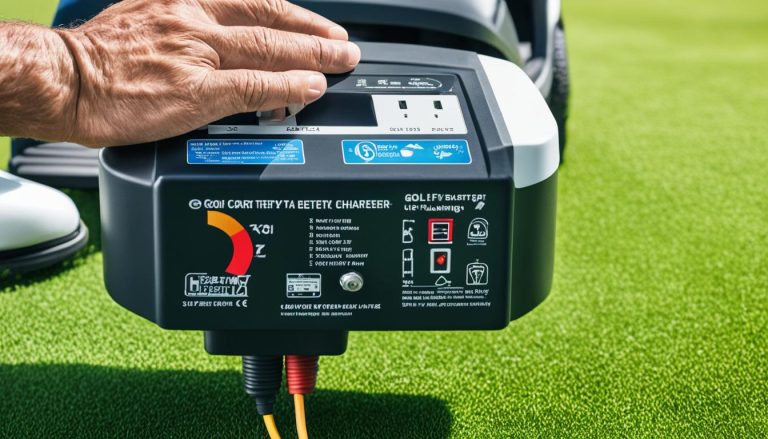
Before you can test your golf cart battery charger, there are a few things you will need. First, you will need a golf cart charger testing kit, which typically includes a voltmeter tester. This will allow you to measure the output of the charger and determine if it is functioning properly. You will also need a golf cart with batteries to test the charger on. Additionally, you will need a minimum output of 20 to 35 volts from the charger to effectively charge the golf cart batteries. By having these tools and components ready, you can proceed with testing your golf cart battery charger.

Having a golf cart charger testing kit is essential for diagnosing any issues with your charger. This kit typically includes a voltmeter tester, which allows you to measure the output voltage of the charger. By checking the voltage, you can determine if the charger is providing the necessary power to charge your golf cart batteries effectively.
In addition to the testing kit, you will need a golf cart with batteries to test the charger on. This will ensure that you can simulate real-world charging conditions and accurately assess the performance of the charger.
It is also important to ensure that your charger has a minimum output of 20 to 35 volts. This voltage range is typically required to effectively charge golf cart batteries. If your charger falls below this range, it may not charge the batteries properly, leading to reduced battery life and performance.
By having these tools and components ready, you can confidently proceed with testing your golf cart battery charger and ensure that it is working optimally to keep your golf cart running smoothly.
Process of How to Test Golf Cart Battery Charger
Testing your golf cart battery charger is an essential step to ensure the optimal performance of your golf cart. By following a few simple steps, you can determine if your charger is functioning properly or if it needs to be replaced. Here’s a detailed process on how to test your golf cart battery charger:
- Check the battery charge: Start by connecting a voltmeter to the charger’s negative and positive clamps. Measure the power output to ensure that there is sufficient power reaching the battery.
- Examine the charger’s cables and wiring: Inspect the cables and wiring circuitry of the charger to ensure there are no loose connections or damaged wires. A faulty connection can disrupt the charging process and affect the charger’s performance.
- Inspect the grounding wire and fuses: Check the grounding wire and the charger fuses for any signs of damage or wear. A faulty grounding wire or blown fuse can prevent the charger from functioning properly.
- Inspect the battery terminals: Examine the battery terminals for any corrosion or loose connections. Clean the terminals if necessary and ensure a secure connection. Additionally, check the liquid inside the battery to determine if it is at the appropriate level. Low or contaminated battery liquid can affect the battery’s performance.
By following these steps, you can effectively test your golf cart battery charger and identify any issues that may be affecting its performance. Regular testing is important to ensure optimal charging and to prevent any unexpected failures or issues while using your golf cart.
| Steps | Actions |
|---|---|
| 1 | Check the battery charge using a voltmeter to measure the power output |
| 2 | Examine the charger’s cables and wiring for loose connections |
| 3 | Inspect the grounding wire and fuses for any signs of damage |
| 4 | Inspect the battery terminals for corrosion and check the liquid level |

Testing your golf cart battery charger is a simple yet crucial process that can help ensure the smooth operation of your golf cart. Regular maintenance and testing will help you identify any issues and take the necessary steps to address them, allowing you to enjoy a trouble-free golfing experience.
How to Test a 36-Volt Golf Cart Battery Charger
Testing a 36-volt golf cart battery charger is essential to ensure optimal performance and avoid charging problems with your club car golf cart. To effectively test your charger, follow these step-by-step instructions:
- Determine the battery voltage by checking the markings on the batteries. This will help you understand the charging requirements of your golf cart.
- Prepare an ammeter by connecting the leads to the cable wire harnesses of the charger. This will allow you to measure the charging current accurately.
- Turn on the switches on the charger and observe the indicator lights. Check if the lights are functioning properly, indicating that the charger is receiving power and operational.
- Monitor the charging process by checking the reading on the ammeter. If the charger is working correctly, it should deliver current to the batteries, and the reading on the ammeter should increase steadily.
Testing your 36-volt golf cart battery charger using these steps will help you identify any potential charging problems and ensure the efficient and effective charging of your club car golf cart.
| Step | Description |
|---|---|
| 1 | Determine the battery voltage by checking the markings on the batteries. |
| 2 | Prepare an ammeter by connecting the leads to the cable wire harnesses of the charger. |
| 3 | Turn on the switches on the charger and observe the indicator lights. |
| 4 | Monitor the charging process by checking the reading on the ammeter. |
How to Test a 48-Volt Golf Cart Battery Charger
To ensure the optimal performance of your 48-volt golf cart battery charger, it’s important to test it regularly. By following a simple process and using a voltmeter, you can determine if your charger is functioning properly. Here’s how to do it:
- Connect the voltmeter to the charger’s positive and negative terminals.
- Measure the available amps by observing the voltmeter’s reading.
- Turn on the charger and ensure that it is providing enough power.
- Check if the charger delivers up to 36 amps, indicating proper functioning.
In addition to testing the charger, it’s essential to understand the different types of golf cart batteries and their charging requirements. The two main varieties are lead-acid batteries and lithium-ion batteries. Each type has specific needs when it comes to charging. Be sure to familiarize yourself with the specific requirements of your golf cart batteries to ensure efficient and effective charging.
| Golf Cart Battery Type | Charging Requirements |
|---|---|
| Lead-Acid Batteries | Require a constant voltage charge to avoid overcharging and undercharging. It’s important to monitor the charging process closely and adjust the charger settings as needed. |
| Lithium-Ion Batteries | Require a specific charging profile to prevent overcharging and maintain battery health. Consult the manufacturer’s guidelines to ensure you are using the correct charging method. |
Benefits of Testing the Golf Cart Battery Charger
Regularly testing your golf cart battery charger offers several benefits. First, it allows for early detection of any potential problems, ensuring that your golf cart always operates at its best. By identifying any issues early on, you can take necessary steps to address them and prevent unexpected failures or issues while you are out on the course.
Second, testing the charger can help save you money by optimizing battery performance and avoiding unnecessary battery replacements or repairs. By ensuring that your charger is providing the correct voltage and current, you can maximize the charging efficiency and extend the lifespan of your golf cart batteries. This can result in cost savings in the long run.
Finally, testing the charger ensures the safety of your golf cart by identifying and addressing any electrical problems that may be affecting its performance. Faulty chargers can pose a fire hazard or cause damage to your golf cart’s electrical system. By regularly testing your golf cart battery charger, you can mitigate these risks and enjoy a smooth and reliable golfing experience.
As for leaving your golf cart plugged in overnight, the modern chargers are designed with safety features. They are equipped with automatic shut-off mechanisms that activate when the battery is fully charged. This not only ensures safe and efficient charging but also allows you to leave your golf cart plugged in overnight without any concerns. So, go ahead and enjoy the convenience of overnight charging without worrying about overcharging or damaging your batteries.
FAQ
How do I test my golf cart battery charger?
To test your golf cart battery charger, you will need a golf cart charger testing kit, a golf cart with batteries, and a minimum output of 20 to 35 volts from the charger. Connect a voltmeter to the charger’s positive and negative clamps to measure the power output. Check the charger’s cables, wiring circuitry, grounding wire, and fuses for any issues. Inspect the battery terminals and liquid inside the battery to determine its condition.
Why should I test my golf cart battery charger?
Testing your golf cart battery charger helps detect potential issues early on, ensuring uninterrupted golfing experiences. It ensures proper battery charging and can troubleshoot electrical problems affecting your golf cart’s performance.
What do I need to test a golf cart battery charger?
To test a golf cart battery charger, you will need a golf cart charger testing kit, a voltmeter, a golf cart with batteries, and a minimum output of 20 to 35 volts from the charger.
How do I check my golf cart battery charger?
To check your golf cart battery charger, connect a voltmeter to the charger’s positive and negative terminals. Turn on the charger and observe the voltmeter’s reading to ensure it is delivering enough power (up to 36 amps for a 48-volt charger). Understand the different charging requirements for lead-acid and lithium-ion batteries.
How do I test a 36-volt golf cart battery charger?
To test a 36-volt golf cart battery charger, determine the battery voltage, prepare an ammeter by connecting the leads to the cable wire harnesses of the charger, turn on the switches, and monitor the charging process by checking the ammeter’s reading.
How do I test a 48-volt golf cart battery charger?
To test a 48-volt golf cart battery charger, connect a voltmeter to the charger’s positive and negative terminals, turn on the charger, and observe the voltmeter’s reading to ensure it is functioning properly, delivering up to 36 amps.
What are the benefits of testing the golf cart battery charger?
Testing the golf cart battery charger allows for early detection of problems, saving money on unnecessary repairs or replacements. It ensures optimal battery performance and addresses any electrical issues that may affect your golf cart’s safety and performance.
Can I leave my golf cart plugged in overnight?
Yes, you can leave your golf cart plugged in overnight. Modern chargers are designed to automatically shut off when the battery is fully charged, ensuring safe and efficient charging.